Tuesday, May 18, 2010
Spring Comfort Food - Shrimp Risotto with Bacon Gremolata
Comfort food is generally associated with winter weather.
But what comforts you when a spring day turns wet, gray and cold?
Light yet satisfying, this dish is best made in the spring when asparagus is at its peak. Spring peas work just as well.
Shrimp Risotto with Bacon Gremolata: serves 4
Shrimp Stock:
1 pound large shrimp, peeled and deveined - set aside. Reserve shells
2 cups water
1 1/2 cups chicken broth
1 shallot, peeled and cut into 4 pieces
6 peppercorns
1 bay leaf
small bunch (a couple of sprigs) fresh parsley
Place the shrimp shells, water, broth, shallot, peppercorns, bay leaf and parsley in a large stock pot. Bring to a small boil and simmer for 15-20 minutes. Strain the stock through a sieve and discard vegetables and shells.
Place stock in a large heavy saucepan. Keep warm over low heat.
Risotto:
2 tablespoons plus 2 tablespoons unsalted butter
1/3 cup shallots, chopped
1 cup arborio rice
1/2 cup dry white wine
1 cup steamed, diced asparagus spears
nutmeg - a few good grinds
salt to taste
2 tablespoons grated Parmesan cheese
Bacon Gremolata:
4 strips bacon, cooked until crisp and drained
2 tablespoons fresh parsley, minced
1 tablespoon lemon zest (about 1/2 lemon)
1/2 teaspoon garlic, minced
Break bacon into small pieces, toss with the parsley, lemon zest and garlic. Set Aside
Melt butter in a large saucepan. Add shallots and saute over medium heat until transparent, about 2 minutes. Add rice and continue to saute another 2 minutes. Rice will turn from white to almost opaque. Add wine and cook until almost all the liquid is evaporated. Add shrimp stock by 1/2 cup full, cooking after each addition until almost all the liquid is absorbed, stirring constantly. This should take about 20-25 minutes.
Stir in shrimp and asparagus and cook until the shrimp are pink and firm. Stir in a few good grinds of fresh nutmeg. Take off heat and stir in the remaining 2 tablespoons of butter and the Parmesan cheese.
Spoon into shallow bowls and top with the bacon gremolata.
Eat with a smile. The spring rains are watering your summer vegetables.
A Cook's Notes: What the heck is gremolata? Gremolata (or gremolada) is a chopped herb condiment typically made of garlic, parsley, and lemon zest. It is a traditional accompaniment to the Italian Osso Buco. Although it is a common accompaniment to veal, the citrus element in gremolata makes it an appropriate addition to seafood dishes.
Monday, May 17, 2010
A Trip to Our Land and Roasted Tomatoes
TBHITW and I spent a wonderful weekend on our land.
First we took a tour of the mill that will make the logs for our home. We were very impressed with the craftsmanship, attention to detail and out and out LOVE of what they were doing. When they are milling the logs for our home, it is our home and only our home that they are building. They work on one home at a time. Then, once everything is milled, the house is actually built. Each log is marked in a complicated system of letters and numbers, then the house is disassembled and shipped to the building site. It boggles the mind. Or at least my mind, which can easily be boggled.
After the mill tour we met with our sales representative, Joan. We spent the better part of the afternoon discussing designs, options, wants versus needs and pricing. Joan is incredibly knowledgeable about the building process. She also gave us tons of good advice regarding design, function and livability of a log home. So many choices, further boggling of the mind.
We stayed overnight in a lovely old hotel on a trout stream and the next morning headed out early to our property.
The best part of the weekend was once again walking the land. Every time we drive up here we pinch ourselves and ask, "Is this really ours?".. We feel incredibly fortunate to be given the opportunity to be stewards of this lovely piece of land.
The first thing we did was clear a small patch of meadow and plant some pumpkin seeds.
A very small pumpkin patch in the center of a four acre meadow.
I planted some sunflowers too.
It felt good to put something into the earth. The ground was rich and brown and warm.
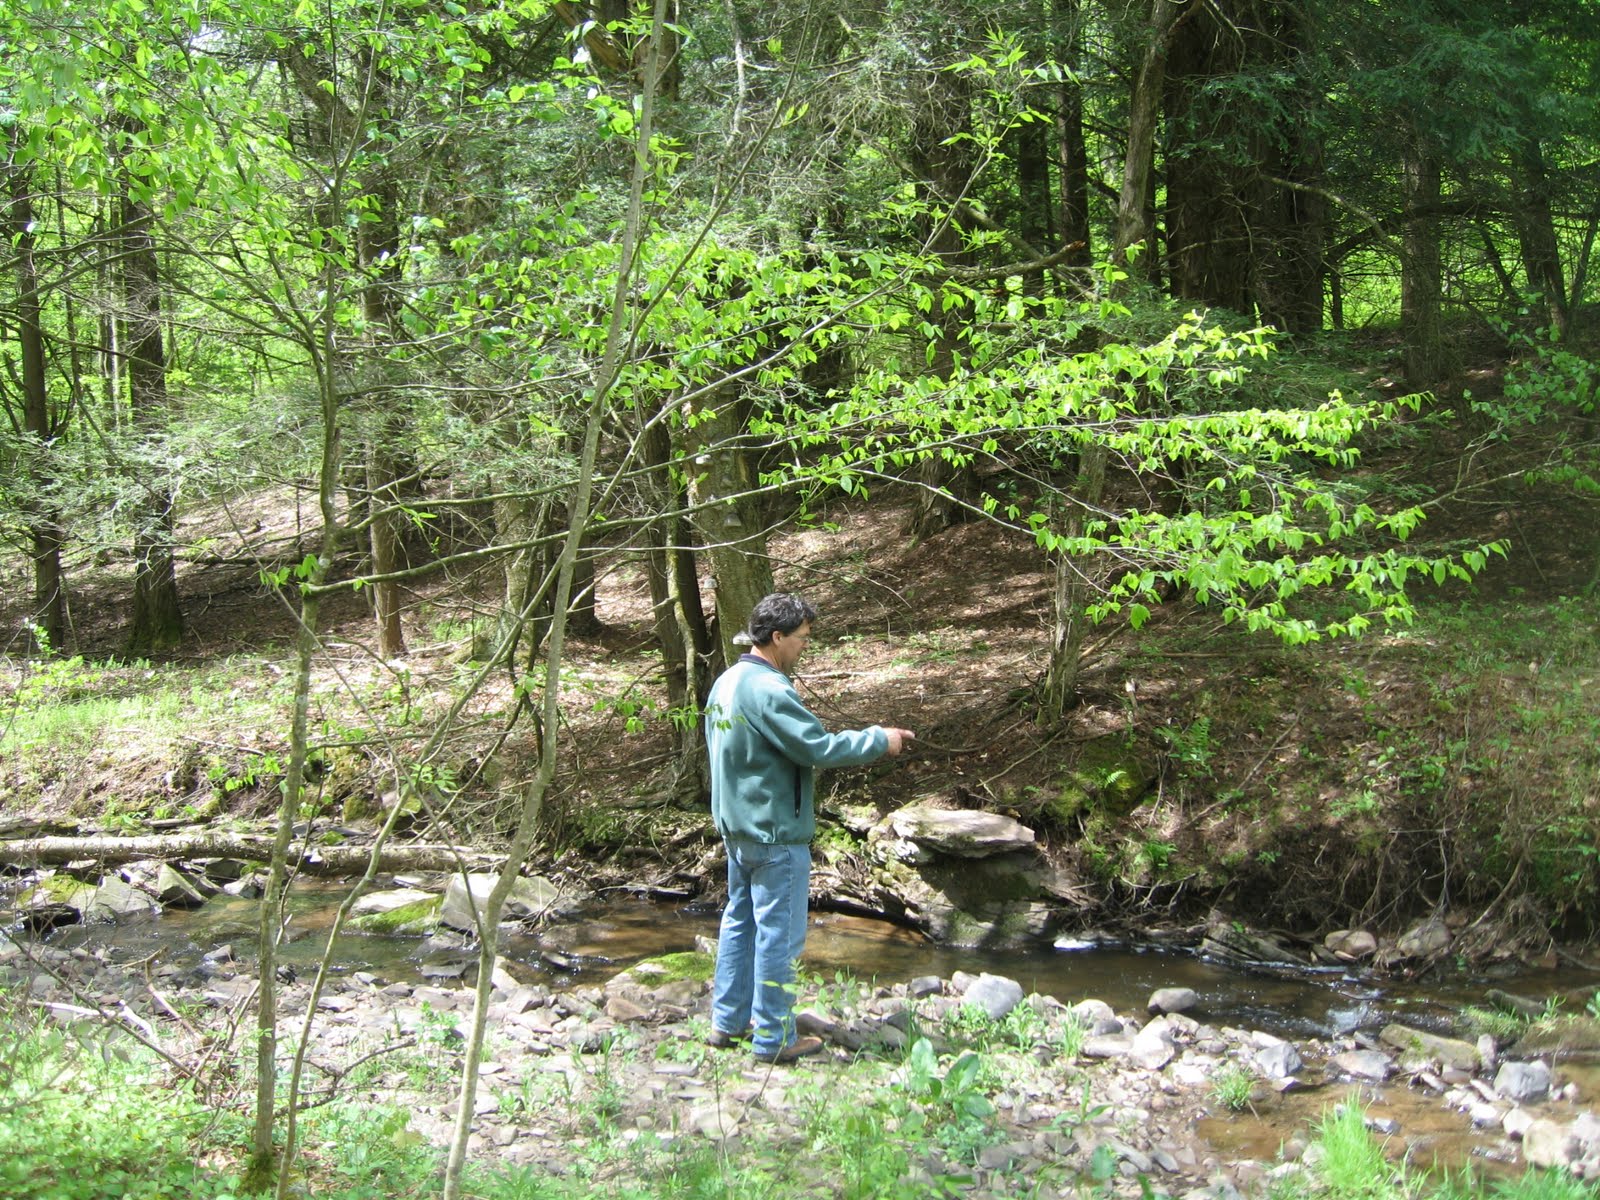
Then we walked to the stream to get some water.
We really like having a stream.
It is beautiful.
Later in the day we met with a local contractor and made arrangements for the driveway to be built. It's a lonnnnggg driveway. About 380 feet. Lots of stone. The driveway is one of the first things that needs to go in. It will accommodate the heavy equipment needed for building. It will also allow us better access to the land.
In the late afternoon, with the waning sun, we drove home, stopping on the way at what we are convinced will become one of our favorite watering holes; Buffalo Zach's. Really good food, reasonably priced and staffed with happy people.
It was a lovely way to spend the weekend and I am looking forward to so many, many more.
Tomatoes won't ripen for another two months around here but I am already craving a meaty, zesty tomato sandwich. In times like this, when I just can't wait another few weeks for the real thing I roast up a batch of Roma tomatoes. Unlike other brands of greenhouse tomatoes Romas are surprisingly flavorful and juicy, year round.
I know, I know, this goes against all my locavore beliefs. But sometimes a girl just needs a good tomato, you know?
Roasted Romas:
10 ripe roma tomatoes
olive oil - about a tablespoon or two
kosher salt
Preheat oven to 225 degrees.
Wash and dry the tomatoes. Slice off the stem end and slice in half the long way. Place on a rimmed cookie sheet. Very lightly drizzle olive oil on the tomato halves and using your hands, toss around to coat. Arrange tomatoes cut side up on the cookie sheet and sprinkle with kosher salt (about a teaspoon).
Roast in the oven, undisturbed, for about 4 hours or until edges are curled and middles are still juicy.
Remove from oven.
To use:
Serve a few tomato halves with a round of herbed goat cheese and slices of crusty baguette.
Or rounds of fresh mozzarella and basil leaves.
My favorite sandwich:
Roasted Roma halves
Fresh mozzarella round
fresh basil
a few slices of ripe avocado
drizzle of olive oil
sprinkle of salt
On fresh baguette.
Yum. I can't wait for summer.
A Cook's Notes: Store your roasted romas in an airtight container in the refrigerator. The tomatoes will actually taste even better after a day or two and will keep up to 4 days.
First we took a tour of the mill that will make the logs for our home. We were very impressed with the craftsmanship, attention to detail and out and out LOVE of what they were doing. When they are milling the logs for our home, it is our home and only our home that they are building. They work on one home at a time. Then, once everything is milled, the house is actually built. Each log is marked in a complicated system of letters and numbers, then the house is disassembled and shipped to the building site. It boggles the mind. Or at least my mind, which can easily be boggled.
After the mill tour we met with our sales representative, Joan. We spent the better part of the afternoon discussing designs, options, wants versus needs and pricing. Joan is incredibly knowledgeable about the building process. She also gave us tons of good advice regarding design, function and livability of a log home. So many choices, further boggling of the mind.
We stayed overnight in a lovely old hotel on a trout stream and the next morning headed out early to our property.
The best part of the weekend was once again walking the land. Every time we drive up here we pinch ourselves and ask, "Is this really ours?".. We feel incredibly fortunate to be given the opportunity to be stewards of this lovely piece of land.
The first thing we did was clear a small patch of meadow and plant some pumpkin seeds.
A very small pumpkin patch in the center of a four acre meadow.
I planted some sunflowers too.
It felt good to put something into the earth. The ground was rich and brown and warm.
Then we walked to the stream to get some water.
We really like having a stream.
It is beautiful.
Later in the day we met with a local contractor and made arrangements for the driveway to be built. It's a lonnnnggg driveway. About 380 feet. Lots of stone. The driveway is one of the first things that needs to go in. It will accommodate the heavy equipment needed for building. It will also allow us better access to the land.
In the late afternoon, with the waning sun, we drove home, stopping on the way at what we are convinced will become one of our favorite watering holes; Buffalo Zach's. Really good food, reasonably priced and staffed with happy people.
It was a lovely way to spend the weekend and I am looking forward to so many, many more.
Tomatoes won't ripen for another two months around here but I am already craving a meaty, zesty tomato sandwich. In times like this, when I just can't wait another few weeks for the real thing I roast up a batch of Roma tomatoes. Unlike other brands of greenhouse tomatoes Romas are surprisingly flavorful and juicy, year round.
I know, I know, this goes against all my locavore beliefs. But sometimes a girl just needs a good tomato, you know?
Roasted Romas:
10 ripe roma tomatoes
olive oil - about a tablespoon or two
kosher salt
Preheat oven to 225 degrees.
Wash and dry the tomatoes. Slice off the stem end and slice in half the long way. Place on a rimmed cookie sheet. Very lightly drizzle olive oil on the tomato halves and using your hands, toss around to coat. Arrange tomatoes cut side up on the cookie sheet and sprinkle with kosher salt (about a teaspoon).
Roast in the oven, undisturbed, for about 4 hours or until edges are curled and middles are still juicy.
Remove from oven.
To use:
Serve a few tomato halves with a round of herbed goat cheese and slices of crusty baguette.
Or rounds of fresh mozzarella and basil leaves.
My favorite sandwich:
Roasted Roma halves
Fresh mozzarella round
fresh basil
a few slices of ripe avocado
drizzle of olive oil
sprinkle of salt
On fresh baguette.
Yum. I can't wait for summer.
A Cook's Notes: Store your roasted romas in an airtight container in the refrigerator. The tomatoes will actually taste even better after a day or two and will keep up to 4 days.
Thursday, May 13, 2010
Stress and Mussels
I don't get stressed about too many things but the one thing that will really set me off is clutter.
You know what I'm talking about.
Stuff.
Everywhere.
Last night the kidadult from college returned for the summer. I'm not sure but I think he moved sometime during the year from his pint sized dorm room to a 12 room mansion because that's how much stuff he brought back.
And it is multiplying on its own. When I went to bed last night I was somewhat pleased that it only took TBHITW, the college boy and the 16 year old about 15 minutes to unload the SUV (and overhead). I remarked what a simple job that was to which all three of them replied, "oh yeah, there wasn't that much stuff to bring home".
This morning I awoke to a set of hand weights, some dirty laundry, a winter coat, a ski helmet and some socks on my kitchen table. Upon entering the family room I noticed right away (I'm clever like that) that we no longer had a floor - rather just piles and piles of pillows, blankets, book bags, 3 (yes, 3!) 4 foot by 2 foot plastic bins with lids with god knows what inside of them. Two desk lamps, various CD's, a stereo, speakers, a game system that I didn't know we owned and random laundry bags (I only recalled giving him one laundry bag)... I'm not even going to mention his bedroom, I just closed the door on that one.
I am stressed. Clutter stresses me out.
When I get stressed I turn to comfort food (who doesn't?). Mussels are a perfect spring dinner. Add a cold glass of white wine, a crusty loaf of bread, sit back and keep telling yourself he goes back in a just a few short months.....
The Good Cook's Mussel Pot: (serves 2)
2 pounds of the freshest mussels you can find, scrubbed and debearded. If any are open, gently click them together, if they don't close, discard them.
1 shallot, minced
1 cup cup dry white wine (sauvignon blanc or pino grigio work well here)
1 garlic clove, minced
2 tablespoons fresh parsley, chopped
2 tablespoons unsalted butter
pinch red pepper flakes
Melt the butter in a large dutch oven or skillet (big enough to hold all the mussels with a lid)
Add the shallots and gently saute until soft.
Add the garlic and stir for a minute.
Add the wine, the parsley and the red pepper flakes and bring to a boil.
Add the mussels, stir to coat and bring back to a boil. Cover. Continue to cook until all mussels are open and cooked through - about 6 to 8 minutes. Discard any mussels that didn't open.
Serve in big bowls, ladling some of the broth over the hot mussels. Pass crusty bread for sopping up the broth.
Dream of autumn.
Monday, May 10, 2010
My Sister's Buns and Chicken Piccata
My sister M is a wonderful baker.
This fact alone is enough to make me [slightly] jealous but add the fact that she weighs about 17 pounds, is tall and willowy and beyond beautiful and well, I may as well keep loving her because that is just too much jealousy for one person to carry around.
Plus she's really nice. And she shares all her recipes complete with her personal notes so that all the testing and tweaking is out of the way and you just end up with a pan full of goodness.
Um, just asking, what kind of buns did you think I was referring to?
M's Cinnamon Buns: (makes 12 really big buns)
All of the comments in ( ) are M's.
Cinnamon Rolls
2 cup milk
1/2 cup sugar
1/2 c vegetable oil
1 package active dry yeast
3 1/2 cups + 1 cup all purpose flour
1/2 teaspoon baking powder
1/2 teaspoon baking soda
1 teaspoon salt
Cinnamon Filling
1/2 cup butter, melted
1/2 cup sugar
Cinnamon
Glaze
4 tablespoon butter, melted
2 cup powdered sugar
3 tablespoon milk (I used a little more)
1 teaspoon vanilla
Combine the milk, sugar, and oil in a large bowl. Microwave for 2 minutes
and then stir well. Sugar should be dissolved. If not, microwave for
another minute. Use a candy thermometer to determine the temperature of the
milk mixture. Wait until it cools down to about 90 - 110 degrees. This is
the best temp for yeast to thrive.
Add the yeast and stir. Then add the 3 1/2 c flour a little at a time until
it is all combined. Cover with plastic wrap and a dish towel and let rise
until double in size - about 1 hour. (Mine took about 2 hours to double)
Take the towel and plastic wrap off. Add the last cup of flour, baking
powder, baking soda, and salt. Stir to combine, you do not need to knead
the dough.
At this point you may cover the bowl with plastic wrap and place in the
refrigerator for up to 3 days. When you plan to prepare the rolls, take the
dough out and let sit on the counter for an hour. You can skip the
refrigerator altogether if you want to just proceed into making the rolls.
Roll the dough into a large rectangle. Melt the butter for the filling and
pour on the dough. Use a pastry brush to spread the butter. Sprinkle on
the sugar and then enough cinnamon to cover the dough.
Now roll it up. You should end up with a log of dough. Use a sharp knife to cut the rolls and place cut side down in either 2 buttered 8x8 [six rolls each) or a buttered 9x13 pan [12 rolls]. Let rise in dishes for
another 20 minutes. (mine didn't really rise much at this point - they rose
up in the oven during baking)
Bake at 375 for 15 - 20 minutes (mine took about 24 minutes) or until light
golden brown.
Combine the ingredients for the glaze and pour over the warm cinnamon rolls
For my mother's day dinner, TBHITW decided he would be the cook. I took on the role of prep chef and and assistant - handing him ingredients (and a glass of wine) when ordered asked to do so.
This recipe is as easy as it is delicious and the best part? You probably have every ingredient you need already in your pantry or refrigerator. We served the chicken with wild rice and steamed asparagus on the side and Sauvignon Blanc in our glasses.
Chicken Piccata (serves 4)
2 boneless, skinless chicken breasts, cut in half and pounded into cutlets
Salt and freshly ground black pepper
Flour (about 1/4 cup)
2 tablespoons of extra virgin olive oil
1/4 cup white wine
1 heaping teaspoon garlic, minced
1/2 cup chicken broth
2 tablespoons lemon juice
1 tablespoon capers, drained and rinsed
2 tablespoons cold, unsalted butter
4 fresh lemon slices
2 tablespoons fresh parsley, chopped
Season the chicken cutlets with salt and pepper, then dredge in flour. Add oil to large saute pan and heat on medium high. Add chicken and and saute until golden brown on each side, about 3 minutes per side.
Transfer chicken to a platter and tent.
Deglaze the pan with wine, then add garlic. Cook until garlic is golden and fragrant and wine is nearly evaporated. Add chicken broth, lemon juice and capers to the pan. Return the chicken cutlets to the pan and simmer for about 2-3 minutes until warm and cooked through. Add any juices from the platter to the pan also.
When chicken is hot and cooked through, remove to warm, clean platter. Add lemon slices and parsley to pan and cook for about 1 minute. Remove from heat and swirl butter into sauce, 1 tablespoon at a time until sauce is slightly thickened. Poor over chicken cutlets, garnish with additional parsley sprigs and serve immediately.
Thursday, May 6, 2010
The Perennial Plate and Like Minded People and Morel Toasts
If you are interested in sustainable living, locavorism and just darn good cooking advice, I urge you to visit The Perennial Plate.
Daniel Klein, author and star of the site is spending a year in Minnesota, cooking, learning and foraging a culinary existence. And the best part? He is documenting his culinary journey for all of us to share. The most recent video he has posted has him foraging for and cooking morels. Watch, Learn, Eat.
Yum.
To view other episodes of The Perennial Plate, go to http://theperennialplate.com/
When it comes to food and where we get it I love finding like minded people. It is exciting to realize that there are more and more people in this country who are living responsibly with their food choices. And make no mistake about it, it is a choice! Choosing to purchase from farmer's markets and CSA's, buying from companies with community ties, planting a garden, shopping in season; all of these practices add up to healthy, natural, good for us and the planet living.
A fellow blogger and like minded eater is having a food giveaway, Robynn at Robynn's Ravings. Click on over to participate and you could be the lucky reciprient of some yummy wholesome food items.
Morel Toasts: Serves 1 (okay, it's really enough for four people, but once you start eating morels you get a little greedy)
1/2 pound fresh, local morels
4 ounces goat cheese
1 teaspoon fresh thyme
1 french baguette
4 tablespoons cold, unsalted butter
Sea Salt to taste (or other crunchy salt like Fleur de Sol)
Mix the fresh thyme into the goat cheese and set aside.
Gently brush morels (or any other type of mushroom you like) to remove any visible dirt.
Melt butter in a large enough saucepan so that you can add all the morels or mushrooms. You don't want to crowd them, each morel or shroom should have its own little space in the pan.
Add fungi and saute until all the liquid cooks off and they have some color on all sides - about 6 to 8 minutes.
Slice the baguette on the diagonal into wedges about 5 inches long and 1/2 inch thick. Toast gently, just to crisp, not to brown under the broiler. Flip and toast other side. Watch it - the bread will burn quickly if you are not careful.
Spread a healthy portion of goat cheese on each warm toast. Top with sauteed morels, then a pinch of crunchy salt. Serve.
Daniel Klein, author and star of the site is spending a year in Minnesota, cooking, learning and foraging a culinary existence. And the best part? He is documenting his culinary journey for all of us to share. The most recent video he has posted has him foraging for and cooking morels. Watch, Learn, Eat.
Yum.
To view other episodes of The Perennial Plate, go to http://theperennialplate.com/
When it comes to food and where we get it I love finding like minded people. It is exciting to realize that there are more and more people in this country who are living responsibly with their food choices. And make no mistake about it, it is a choice! Choosing to purchase from farmer's markets and CSA's, buying from companies with community ties, planting a garden, shopping in season; all of these practices add up to healthy, natural, good for us and the planet living.
A fellow blogger and like minded eater is having a food giveaway, Robynn at Robynn's Ravings. Click on over to participate and you could be the lucky reciprient of some yummy wholesome food items.
Morel Toasts: Serves 1 (okay, it's really enough for four people, but once you start eating morels you get a little greedy)
1/2 pound fresh, local morels
4 ounces goat cheese
1 teaspoon fresh thyme
1 french baguette
4 tablespoons cold, unsalted butter
Sea Salt to taste (or other crunchy salt like Fleur de Sol)
Mix the fresh thyme into the goat cheese and set aside.
Gently brush morels (or any other type of mushroom you like) to remove any visible dirt.
Melt butter in a large enough saucepan so that you can add all the morels or mushrooms. You don't want to crowd them, each morel or shroom should have its own little space in the pan.
Add fungi and saute until all the liquid cooks off and they have some color on all sides - about 6 to 8 minutes.
Slice the baguette on the diagonal into wedges about 5 inches long and 1/2 inch thick. Toast gently, just to crisp, not to brown under the broiler. Flip and toast other side. Watch it - the bread will burn quickly if you are not careful.
Spread a healthy portion of goat cheese on each warm toast. Top with sauteed morels, then a pinch of crunchy salt. Serve.
Wednesday, May 5, 2010
Drug Stores and Garlic Fajitas
Happy Cinco De Mayo everyone!
I was in the drug store this morning picking up a prescription. Nothing serious, thanks for asking...
The pharmacy is located way in the back of the store so I had to wind my way through a couple of aisles to get to the pick up counter.
What is it about drug stores these days? All the stuff a drug store should carry is located in the back of the store. Cold tablets, cough medicine, anti-gas pills (not that I need that), band aids, ointment, vitamins, ace bandages and of course, the pharmacy.
In the front, middle and sides of the store all manner of other merchandise can be found. Since when did drug stores start carrying motor oil? Or toys? Toys? Yes, two entire aisles filled with toys; swim toys, dolls, stuffed animals, huh? Isn't that what Toys R Us is for?
A refrigerated case took up an entire side aisle. It contained milk, eggs, butter, cream cheese, sour cream, lunch meat and cheese. Opposite the refrigerated case were shelves with bread, ketchup, mustard, cake mixes, spam, beans and cans of vegetables, to mention just a few products. Is this where people now go instead of the grocery store?
I understand the hair dye, shampoo, conditioner, hair spray, deodorant, cologne, makeup and magazines. I do, I get toiletries (and in my house a magazine is considered a toiletry.. ahem).
But my biggest surprise came when the last aisle I needed to circumvent to get to the pharmacy was blocked by a big display rack with, wait for it...
Shoes. Yes, shoes.
So now you can get your RX, cure your cold, dye your hair, freshen your makeup, smell good, buy lunch, stock your pantry, catch up on the latest rompings of Kate Gosselin and Lindsay Lohan AND buy yourself a pair of shoes.
Wow. I guess that's where they get the term "convenience store".
Oh, and I LOVE my new shoes.
And the two pair I bought for my grand daughters.
Garlic Fajitas: feeds 4
1 bulb garlic, top sliced off
1 Pound Skirt Steak (preferably grass fed)
1 red bell pepper, cut into 1/2 inch slices
1 green bell pepper, cut into 1/2 inch slices
1 sweet yellow onion, sliced
1 avocado, sliced
1 package flour tortillas
2 limes, juiced
Olive oil
Kosher Salt and freshly ground black pepper
Cilantro, chopped
Sour Cream or Greek style yogurt for serving (optional)
Salsa for serving (optional)
Roast the Garlic by preheating oven to 350 degrees F. Slice off the top 1/4 inch of the garlic bulb. Set the bulb on a piece of aluminum foil, drizzle with olive oil and top with a pinch of salt. Bunch up the foil to create a "flower" top and place in oven for one hour. Remove from oven, unwrap and allow to cool. Can be done one or several days in advance. Store in refrigerator if not using right away.
When the garlic bulb is cooled, squeeze out the soft cloves and mash on a cutting board using the flat edge of your knife.
Place meat in a plastic bag, add garlic and a few good drizzles of olive oil, the juice of one lime and a generous pinch of salt and a few grinds of fresh pepper. Using the outside of the bag, massage the oil and garlic and seasonings into the meat. Refrigerate for 1 hour or up to 24 hours.
Preheat oven to 375 degrees F.
In a bowl toss the peppers and onion slices with a few drizzles of olive oil. Place on a rimmed cookie sheet and sprinkle with a little salt. Roast in the oven for 30 minutes, turning half way through. When done, remove to platter. Set aside.
Slice the avocado and sprinkle with lime juice, arrange on the platter with the vegetables. Set aside.
Wrap the tortillas in some foil, place in the oven to warm while you prepare the meat.
Preheat grill or grill pan. Grill meat for 3-5 minutes per side, depending on your preference. 3 minutes for rare, 4 for medium, etc..
When meat is done, tent and let rest for 5-10 minutes. Sprinkle with chopped cilantro and slice on the diagonal. Place on the platter with the roasted vegetables, and sliced avocado. Pass the tortillas for wrapping. Pass sour cream on the side.
A Cook's Notes: I am serving the fajitas this evening with black beans and yellow rice on the side. And of course a Margarita. And I will be wearing my new shoes.
A word about the shoes: My shoes are called Aspire by okabashi (okabashi.com) - they are made in the USA, supportive, dishwasher safe, anti-microbial and endorsed by The American Chiropractic Association. But the best part? They are really comfortable and were a bargain at $14.99.
Legal Stuff: I am not an employee of Okabashi nor have I been paid for a review of their shoes. I just went to the drug store this morning, bought them and have been wearing them all day.
Monday, May 3, 2010
The Good, The Bad and Margaritas
Lots of things were happening this weekend in my neck of the woods.
First the Bad News:
If you are a regular reader you know I visit NYC frequently. In fact, I was in NYC last Sunday, and the Wednesday before that too. Right there. In Times Square.
This is frightening to me. Truly frightening and disturbing. Frightening because someone wanted to KILL people. Innocent people. Disturbing because as the police were clearing Times Square, people were crowding the barriers and taking pictures. Have people learned nothing about personal safety? I mean, if I had been there I would have been running, YES RUNNING, in the other direction.
WTF on both counts. WTF to the deranged maniac who parked an SUV with a home made bomb in the middle of Times Square and WTF to the tourists who milled about waiting to see what was going to happen next. I just don't get it. Maybe it's me. Maybe I'm getting old.
Now the Good News:
No one was hurt and I wasn't there.
And TBHITW and I went to an Uno de Mayo Party on Saturday night. Yes, we know it's Cinco, but we are way to old to party on a work night.
There are a lot of Margarita mixes on the market but if you want a really, really good one you have to make it yourself, from scratch. Both events of this past weekend called for a double batch. Happy Cinco de Mayo!
A Perfect Margarita: (makes one, but can easily be doubled, tripled, etc)
1 1/2 ounces Tequila
1/2 ounce triple sec or Cointreau if you are feeling rich
1 ounce lime juice
Pour all three ingredients in a shaker with crushed ice. Shake vigorously.
Slide a lime around the outer rim of your margarita glass. Dip the rim in salt (optional). Strain drink into glass.
Salud!
And where ever you are, be safe.
Subscribe to:
Posts (Atom)