Friday, April 16, 2010

The Greek Store and Arugula and Strawberry Salad with Pecan Crackers


In the next small town over from the small town where I live in is a great little store called, The Greek Store.

The Greek Store sells all manner of wonderfully sinful Greek delights (not that Greeks are sinful, just some of their food!).

Down each narrow aisle of the store, food treasure after treasure is offered up to the shopper while the owners yell back and forth in their native tongue.

Salty, briny olives, black, green and pink, glistening in huge vats.

Spanakopita that is oozing with feta and spinach all stuffed into light, buttery filo.

Hummus, made the right way, with lots of garlic and lemon.

Baklava that is so moist, the honey runs down your wrists when you take a bite and nobody cares if you suck your fingers when you're done.

Big jugs of red wine encased in twine, reminiscent of a 60's movie where fat candles ran hot wax down the sides of spent bottles.

First communion veils and rosaries are somehow sandwiched in with cheese, bread, olives, salt, anchovies and wine.

At Easter, there are fat loaves of round bread with hard boiled eggs baked right into the centers.

But the most impressive, beautiful, thing they sell is home made Filo dough.

Oh, perfection.

It is nothing like the dry, cracking frozen dough you buy in the grocer's freezer. You know the stuff I'm talking about.

The stuff that made you cry the first time you tried making anything with it? You brought it to room temperature and covered it with the moist kitchen towel just like the package said to and it still broke and splintered in your very hands. You did your best patching it up with more melted butter than should be legal, only to bake it and end up with tops that burned and a middle that was gooey and undercooked.

Not The Greek Store's Filo. This dough is soft and pliable. It has never seen the inside of a freezer and as long as The Greek Store is in business, it never will.

Anyway,

This salad is easy enough for company and impressive enough for family. No, I didn't get that mixed up. An old Greek saying tells us "To treat company like family and family like company if you wish to be blessed by both"

Arugula with Strawberries on Pecan Crackers (makes 4 salads)

Pecan Crackers: (makes 1 pan, about 12 to 14 crackers each 1"x4")
8 ounces Filo Dough* or 12 pieces + a few for mistake making
2/3 cup pecans, ground fine in a food processor
2 tablespoons sugar
honey
1 stick unsalted butter

Salad:
4 cups fresh baby arugula, washed and spun dry
1 cup fresh sliced strawberries
4 ounces fresh goat cheese
olive oil
balsamic vinegar
sea salt and freshly ground black pepper

For the crackers, preheat the oven to 375 degrees F.

Combine the ground pecans and the 2 tablespoons of sugar in a small bowl. Set aside

Melt the butter in a small ramekin.

Using a pastry brush, use some of the butter and butter the bottom of a rimmed cookie sheet.

Unroll your filo dough. Have a moist, clean kitchen towel ready and keep it on top of the filo when you are working with a piece. Don't put the towel directly on top of the filo, put a piece of wax paper or plastic wrap between the dough and the towel.


Lay one piece of dough on your cookie sheet and using your pastry brush, butter it well. Repeat until you have 6 pieces of filo dough stacked on top of one another, making sure you butter each piece all the way out to the ends of the dough.

I really should buy new pans, but these are so well seasoned... they just look nasty....

Next, sprinkle the nut and sugar mixture over the dough. Make sure it's even, all the way to the ends.

Stick a teaspoon into a jar of honey, lift it straight up and drizzle the nuts all over with a thin, steady stream of honey. Be scant, we are just giving it some sweet richness and a little moisture.

Do you know how hard this picture was to take? One hand on the spoon, the other on the camera?

Now, place a piece of filo dough on top of the nuts and honey, butter and repeat until you have 6 pieces of dough. Make sure you butter the top piece really well - you don't want it to dry out and crack while baking.

Even the best made dough misbehaves sometimes. Be gone you bad piece of Filo.


You are no help at all and no, you cannot have that piece of dough.

Pop the cookie sheet with your buttered filo cracker into the oven for 8 minutes or until golden brown and slightly puffed on top. The top will fall as the cracker cools.


When completely cool use a pizza cutter and cut the cracker in half horizontally, then into 1 inch "strips".. you will have a rectangular cracker about 1 inch by 4 inches.

Assemble the salad:

Place two crackers on each plate, to the side. Place about a cup of arugula on each plate, allow most of cracker to show. Sprinkle arugula with 1/4 cup fresh sliced strawberries and a few dobs of goat cheese. Drizzle each salad with about a teaspoon of high quality olive oil and a splash of balsamic vinegar. Add a pinch of sea salt and a grind of fresh pepper. Serve.

A Cook's Notes: *filo dough - if you only have access to frozen filo dough check the date on the box and buy the absolute freshest box you can find. Filo tends to dry out the older it is, even when kept frozen. Defrost in the refrigerator and use it as soon as you can. With practice, you can master the filo!

A great variation to the strawberries (if they are not in season where you live) are roasted red pears. Peel, core and quarter 2 pears. Sprinkle with honey and thyme. Roast at 375 for 30 minutes. Let cool to room temperature. Use blue cheese in place of the feta - everything else remains the same. YUM.

ps. you will have a few leftover crackers. Good, because people will ask for more.

Tuesday, April 13, 2010

Beekeeping and Spring Grilled Dinner


So.

I've been busy.

Busy as a bee you might say.

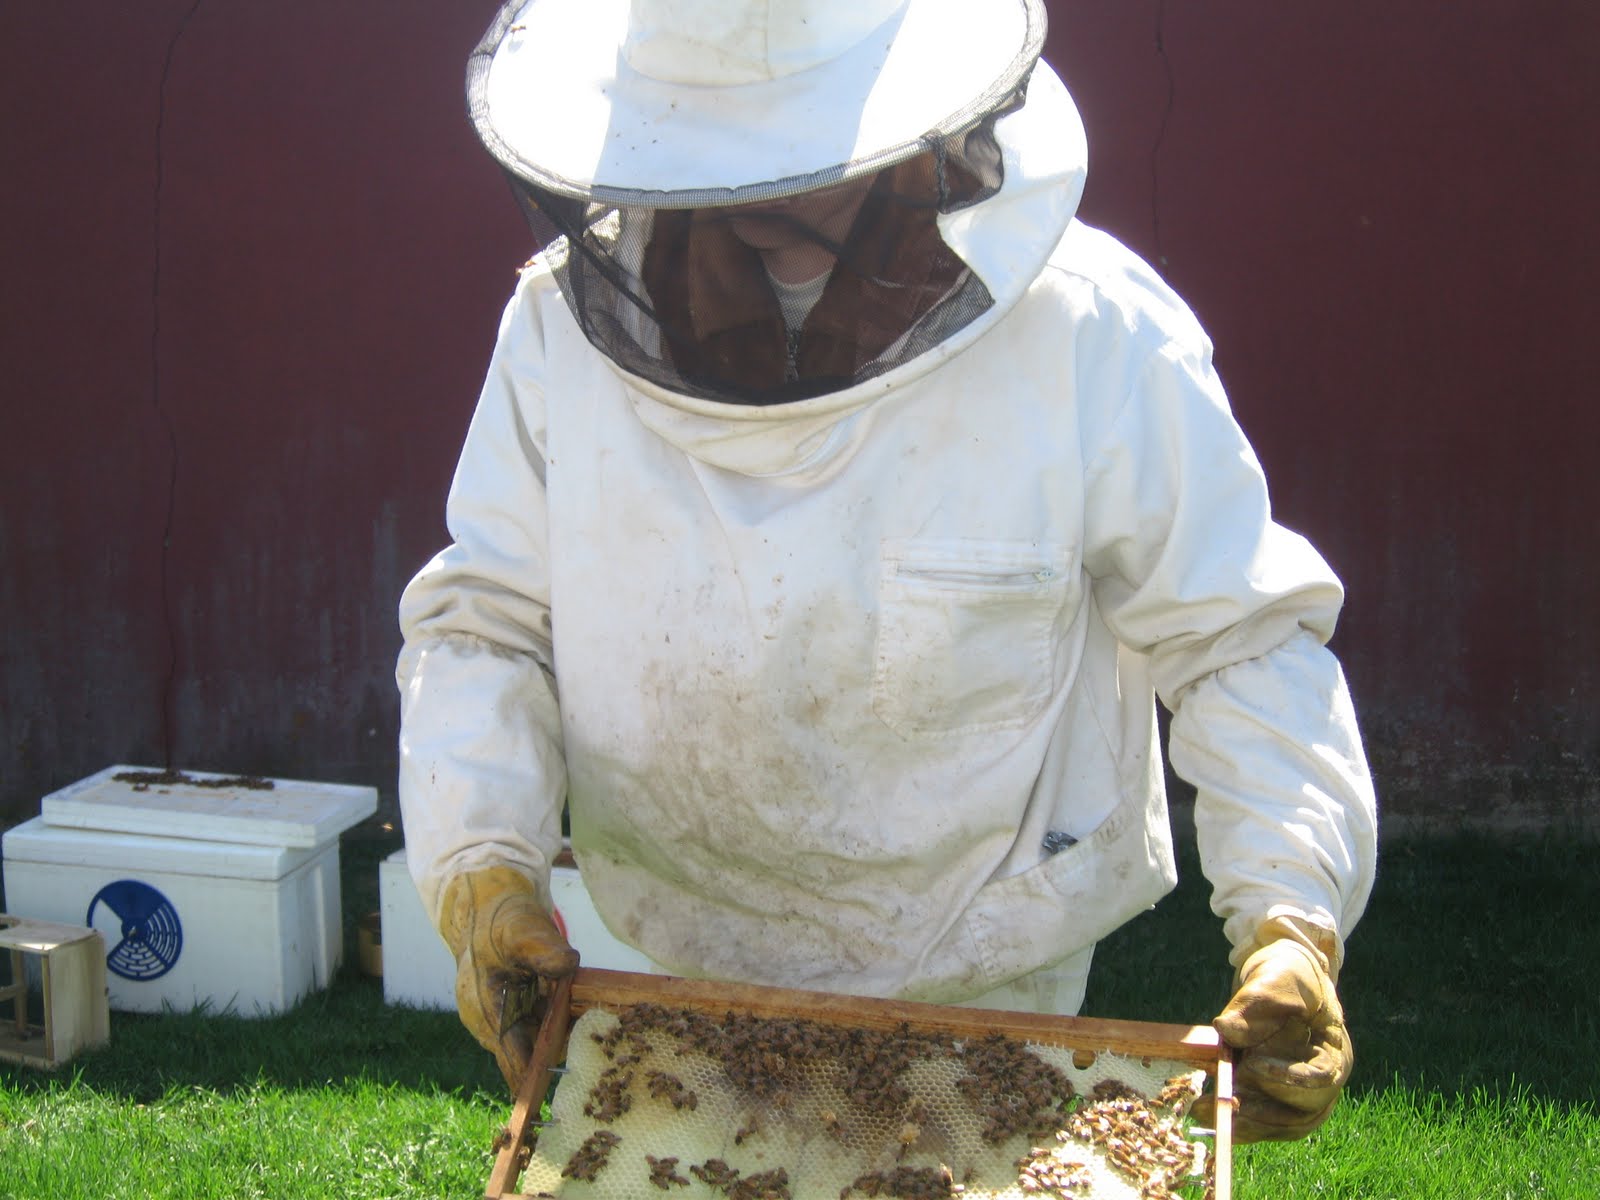
The days have been dawning with perfect spring weather (a welcome change after all the rain, then blistering heat we've had). Cool, crisp, sunny. The perfect combination for cleaning out flower beds, setting in seed, spreading compost and learning about Beekeeping.

Yes, bees. Honey bees to be exact.


My friend Anne and I took an Apiarist Class on Saturday at Alstede Farm in Chester, NJ.

Such fun! And not a single sting.

What I learned:

  • A single healthy, backyard hive can produce about 70 pounds of honey for the home beekeeper (they produce more but you have to leave them some for the winter)
  • Bees are not out to sting you. They are merely guarding their home. Stay back about 5 feet from the hive and you are okay.
  • The queen bee lives about 2 years. All the other bees, about 4 to 6 weeks.
  • The hive is really an organized community with nurses, nurseries, workers, wax makers, nectar collectors, guards, honey makers and even bees whose job it is to cool or heat the place. I guess these are the HVAC Bees.
  • Bees are house trained. They will not soil in their hive and will "hold it" up to 3 weeks if need be, until they can leave the hive and seek relief outside.
  • A bee will travel up to 4 miles from their hive to seek nectar.
  • It takes 9 pounds of nectar to make 1 pound of wax or 1 pound of honey.
  • The drone bee's only job is to mate with the queen. Then, they die.
  • It's good to be the queen.
The class covered all aspects of beginning beekeeping. I was mesmerized. I would like to be an Apiarist once we move up to "the land". Studies have shown that gardeners who keep bees (about a hive per 2 acres) will increase their yield by 100% percent.
100 PERCENT.
That sounds like a deal to me, plus you get HONEY!!

I left Alstede Farms with new found respect for bees, a better understanding of the nature of beekeeping and a real craving for honey.

Fortunately, along with freshly picked asparagus, the farm stand was selling honey. Go figure.

To me, this meal spells springtime, it incorporates fresh spring lamb, honey, peaches and of course, asparagus:

Coffee-glazed lamb chops with honeyed peach chutney and fresh grilled asparagus (serves 4)

1 rack of lamb (8 ribs) cut into double chops (2 bones) remove from refrigerator 1 hour prior to grilling and season with salt and pepper


Heat grill to medium high.

For the glaze:
1/2 cup strong brewed coffee
2 tablespoons honey
2 tablespoons apple cider vinegar
1 tablespoon white or dark rum
1 teaspoon garlic, minced
1/2 teaspoon cinnamon
1/4 teaspoon allspice
1/4 teaspoon pepper flakes

Combine all the glaze ingredients in a small saucepan and bring to a boil. Continue to boil the liquid until it is reduced and becomes syrupy and coats the back of a spoon. About 6 minutes. Set aside.

Peach Chutney:
1 tablespoon olive oil
1/4 cup red onion, sliced thin
1 teaspoon fresh ginger, minced
1/4 teaspoon red pepper flakes
1/4 cup water
2 tablespoons honey
2 tablespoons apple cider vinegar
1/2 cup dried fruit (raisins, apricots or cherries) I like cherries, but any are delicious!
2 cups frozen peach slices
1/2 teaspoon cinnamon
1/4 teaspoon allspice
1/4 cup fresh mint leaves (torn)

Sweat the onion, ginger and pepper flakes in the olive oil until onion is soft and translucent.
Add the dried fruit, water, honey and vinegar and cook for about 5 minutes until the fruit is soft and the liquid is syrupy.
Take off the heat, stir in the peaches and seasonings, except for the mint. Cover.


Grilled Asparagus:
1 pound fresh asparagus, trimmed by snapping off bottoms
drizzle of olive oil
drizzle of balsamic vinegar (I like white balsamic for this, but dark is good too)
Sea salt
Freshly ground black pepper.

Drizzle asparagus with olive oil and vinegar, toss to coat.

Grill lamb chops, basting with the coffee glaze; about 6 minutes per side for medium.

Add asparagus to hot grill, grill for about a minute, roll and grill for another minute. Remove to platter and sprinkle with sea salt and black pepper.

Plate the lamb chops. Stir the mint into the chutney, serve on the side with the asparagus.


A Cook's Notes: If you feel you need a starch with this meal, make corn bread but substitute the milk in your recipe with coconut milk and throw in a hand full of flaked coconut to the batter. Bake as you normally would. This will add a Jamaican flair to your dinner. And who doesn't like the carribean?

While I was "bee"ing a bee student I caught sight of these little darlings, how cute are they?


Thursday, April 8, 2010

Practicing What I Preach and Ginger Glazed Chicken


Just so you know, I really do practice what I preach:


5 pounds of shelled peas:

Blanched, bagged and ready for the freezer (off camera - a big bowl ready for tonight's dinner)


Ginger Glazed Chicken: serves 4

4 medium skinless, boneless chicken breasts
salt and pepper
1/2 cup chicken broth
1/2 cup brown sugar
1/4 cup honey
1/4 cup orange juice
2 teaspoons ground ginger

Wash and pat dry your chicken breasts. Season with salt and pepper. Preheat the grill.

Combine chicken broth, brown sugar, honey, orange juice and ginger in a small saucepan. Bring to a big simmer and cook until syrupy, about 5 minutes, stirring occasionally. Let cool slightly.

Grill chicken breast, brushing on the ginger glaze.

Serve with fresh peas. (what? that surprises you?)


A Cook's Notes: these chicken breasts were large so I made only 3 - plenty for dinner and some leftover for a delicious chicken salad for tomorrow's lunch. Cube leftover chicken, add raisins, celery, almonds and the least amount of mayo to hold together, serve on torn Boston Lettuce leaves.

Wednesday, April 7, 2010

Kindle VS Nook and Spring Peas


I am a reader. I read ALOT. Books, newspapers, magazines, cookbooks, recipes, books, did I mention books? If I'm doing something where I can't read, like sewing, I listen to audio books. I TRY to visit my local library as often as possible but I also BUY books. ALOT.

TBHITW and I are trying to lighten our load and a big part of our load is books. Lots of books. Stacks of books. Bookcases full of books. Books under beds, on night stands and dressers, and on the coffee table (why is it called a coffee table? I never put coffee on it).

So TBHITW suggested I buy myself a Kindle from Amazon.com. Barnes and Noble also have their version of a Kindle, it's called a Nook. I like the idea of a handheld device that can download a book (and store up to 1,500) in a matter of seconds. I like the idea of not having all these books laying around.

I like the idea of not having to drive to a book store or library.

I did some green research and if I buy 40-50 e-books, the environmental impact of electronic device versus print book is paid for. I will definitely buy more than 40-50 e-books.

Does anyone out there have either e-reader? Any opinions? Any help in comparison shopping? I'd appreciate any feedback anyone can offer.

Now then,

I don't care how many daffodils bloom in my front walkway garden.


Or how many incredible pink trees I see:


Or how many little yellow flowers Holly stops to sniff (she loves these things):


To me, it is not officially spring until these babies appear in the market:


Fresh, spring peas. Oh joy, oh rapture. I could eat these little green pearls everyday and not regret one mouthful. And when my family can absolutely eat not one more pea? Time to freeze for the winter. Peas freeze beautifully and on a cold dark day in January, steaming up a few handfuls of peas will give you hope for spring.

Finally, it's here - spring AND peas!

Fresh Peas with Olive Oil and Mint: (make as much as you want)

Peas in their pods - shell as many as you need (about 1/2 cup per person)
Salted boiling water
Sea Salt
Olive Oil
1 tablespoon fresh mint, chopped

Shell the peas and place in a fine mesh strainer. Meanwhile, set a pot of water on to boil. Add some salt to the water.
Immerse the strainer into the pot of water and boil peas for 3 to 5 minutes. Taste a pea to make sure it is tender.


Raise the strainer out of the water, place peas in serving bowl, drizzle with olive oil, sprinkle with sea salt and toss in the fresh mint.

Yum.

Freezing Peas: Blanche the shelled peas in boiling salted water for 2 minutes. Strain and run under cold water to stop the cooking process. Let peas drain and dry off. Freeze in individual zip lock bags. They stack beautifully and take up hardly any room in your freezer. To cook, steam or microwave in a little water.

Do your local farmer a favor, if you find peas at the market that were grown locally, buy 10 pounds or so. Come this winter, you and your local farmer will be happy you did.

A Cook's Notes: I just realized that it has been a year since I opened this blog. Thank you all for following, encouraging, commenting and most of all COOKING!

As always, Bon Appetite!


Tuesday, April 6, 2010

A Spring Break and Pasta with Artichokes and Sun Dried Tomatoes


Last Wednesday we packed up the truck and headed north to Killington, Vermont for a much needed spring break. The kidadults were off from school, I had no cooking gigs and TBHITW squeezed out a few days of rest from his non-stop work schedule. (yeah, right.. he took calls from the slopes, but that's another post)

Ah. Spring Skiing.
Sun, Snow and temperatures in the 70's.

Here I am enjoying the freedom of warm weather skiing without the cumbersome coat, ski pants, hats and scarves of typical winter downhilling.


NOT. I mean, who doesn't wear a helmet these days?


But I do remove the lining from my coat and (gasp) go without long johns. (and we do wear helmets, we just removed them for the photo op)

We rented a small condo slope side and enjoyed uncrowded lifts, warm sun and incredible conditions. And if you ask the 16 year old kidadult, great views. ahem.

One of my favorite things about family vacations is long, leisurely dinners. Because all things food fall to me, I usually plan half our meals out at casual, local, innovative restaurants.

And the other half as eat-in, easy, yet delicious dinners around a big dining room table filled with stories of the day's adventures. Someone will toss the salad while someone else will slice the bread. TBHITW will fix us a cocktail and I will make the main course.

Wait, that's in a dream I once had. Reality: I make the salad, slice the bread, make some cocktails and cook the main course while the family asks 400 times if dinner is ready yet because they are starving.

Anyway, these are the memories I cherish as a family. All of us healthy, tired from a physically exhausting day spent outside, hungry (with true hunger) and together, enjoying good food and happy times.

This recipe will feed a crowd of hungry adventurers as well as satisfy the gourmond in you and you can toss the salad, slice the bread AND make a cocktail without wearing yourself out.

Pasta with Artichokes and Sun Dried Tomatoes: serves 6

1 medium onion, diced
3 tablespoons olive oil
2 garlic cloves, minced
1/2 cup sun dried tomatoes, sliced
1 (15 1/2) ounce can artichoke hearts (8-10 count) drained and halved
1 teaspoon dried basil (or 2 teaspoons fresh)
1 tablespoon fresh parsley, chopped
1 can (13-ounce) chicken broth (low salt)
1/2 cup dry white wine
1 tablespoon flour
1 pound penne rigate pasta
grated romano cheese to taste

Saute onions in olive oil until soft and translucent. Add garlic and saute another minute, just until fragrant and soft. Add sun dried tomatoes and artichokes, basil and parsley and cook 3 minutes. Add chicken broth and wine. Bring to a boil. Reduce heat and simmer about 15 minutes. Dissolve flour in 1/4 cup cold water. Bring sauce back up to a boil and whisk into sauce. Reduce heat and allow to simmer and thicken.

Meanwhile, cook pasta according to package directions. Drain and add pasta to sauce, cook and stir for 2 minutes. Turn out in large bowl, sprinkle with grated romano cheese and serve.

I serve a crusty loaf of hot Italian bread and a simple romaine salad on the side.

What are some of your favorite vacation memories?

Saturday, April 3, 2010

I say Tomato, You Say Toe-ma-toe


I went to the grocery store this morning after Emma, Holly Bear's trainer left. We just love Emma, she is the female equivalent to Caesar, the dog whisperer. Holly Bear needed a nap after her training session, so it was the perfect time for me to see what was new in the produce aisle.

Now, I try not to go to the grocery store with a menu in mind, rather, I try to let the grocery store plan my menu. Today's good find were fine, fresh, English peas. English peas reminded me of a Tyler Florence recipe for Potato Gnocchi with Peas and Prosciutto and Ricotta.

TBHITW and I originally hail from different parts of the country. He comes from Michigan with a stop in New Orleans for a few years before settling in the Northeast. Me, I come from Pennsylvania with a stop in Orlando, Florida before arriving here in New Jersey.

This difference in our origins leads to different pronunciations of certain words. For instance, he says crik when referring to a small stream (creek), I say creak. He says ruff for roof, I pronounce it, well, roof. You get the idea. We usually agree to disagree, except in the case of Gnocchi. I say, Knee-owe-kee, he says No-key. Sometimes, just to really get my goat, he says Knock-key, insisting that both are correct. He is an annoying man sometimes.

If anyone out there has the absolute correct pronunciation of these little pillows, keep it to yourself. Unless of course it is Knee-owe-kee.

Potato Gnocchi with Peas, Prosciutto and Ricotta - serves 4

2 pounds (about 4) russet potatoes
1 teaspoon salt
a few fresh gratings nutmeg (about 1/8 teaspoon)
1/2 cup grated Parmigiano-Reggiano
1 egg white
1 to 1 1/2 cups flour
1 1/2 cups fresh (or frozen and thawed) peas
1/4 pound prosciutto
1 large shallot, finely diced
extra-virgin olive oil
salt and pepper
1 Tablespoon butter
grated parmesan
2 cups Lemon Ricotta (recipe follows)
bunch watercress

Preheat oven to 350 degrees. Scrub, dry, pierce, oil and salt potatoes. Bake to 45 to 60 minutes until knife easily pierces. Cool slightly. Scoop potatoes out of skins, mash with hand masher or put through ricer. Add salt, nutmeg, baking powder, grated cheese and egg white. Add flour a little at a time, starting with one cup. Mix with your hands until a rough dough forms. Transfer to lightly floured surface. Gently knead until smooth, adding a little more dough to keep from sticking.

Break off a piece of dough, roll back an forth into a rope about the thickness of your index finger. Cut the rope into 1 inch pieces. Gently roll each piece down the prongs of a fork while pressing a dimple into the back side of gnocchi. This will form ridges that will hold the sauce. Place on a floured cookie sheet. Continue rolling and cutting until done. Cover with plastic wrap and refrigerate until ready to cook. You can also buy store bought Gnocchi.

Meanwhile, make the lemon ricotta:
2 cups whole milk ricotta
zest of one lemon
salt
Mix it all up and set aside until ready to cook gnocchi. This should be close to room temperature for plating. If you make it in advance, remove from refrigerator 30 minutes prior to cooking gnocchi.

Blanch peas in boiling, salted water. Set aside. Reserve salted water for cooking gnocchi
Bake 4 pieces of prosciutto in 350 oven for 5-8 minutes until crisp. Watch carefully. Set aside.

Dice shallot and saute in olive oil in large saute pan until soft and translucent. Add drained peas and toss to coat.

Cook gnocchi in boiling, salted water for 2 minutes after they begin to float. Transfer by slotted spoon into pan with peas. Add a ladle of cooking water. Add 1 Tablespoon butter. Sprinkle with parmesan cheese. Salt and pepper to taste.

Plating:
Spoon a dollop of lemon ricotta in center of plate. Top with peas and gnocchi. Top with small handful of fresh watercress. Top with 1 piece crumbled prosciutto. Optional: drizzle with a scant half of thimble full of white truffle oil.

Now put down the Websters Dictionary and enjoy your meal.


Thursday, April 1, 2010

Making Pierogies For My Dad

This post originally appeared in 2009 - my dad's operation was a success.
We still love periogies.


This is a picture of my mom and dad on their wedding day.

Everyone in my family gathers at my older brother's house on Easter. My brother supplies the ham. It is the best ham I have ever eaten. He buys it at an old Polish butcher in an even older Polish neighborhood. One of those neighborhoods that hardly exist anymore. He doesn't do anything fancy to the ham. No glaze, no pineapple. No studding it with cloves. But he does slice it thick and hot and piles it high on a big platter all pink and moist. Not too salty and never dry.

Everyone brings something to the Easter table. About a week or so before Easter Sunday we start making the phone calls, "what should I bring, what is mom bringing?" " What is everyone else bringing?" By the big day we have a table that is groaning under the weight of sweet potatoes and beans and eggs and cheese and bread and a dozen or so other dishes from our past and some from our present.

This year, I'm making Pierogies for my dad. My dad needs an operation. It's a biggy. It really doesn't matter so much what kind of operation it is. The important information is that it is a serious operation. He will be in the intensive care unit for a couple of days, then a regular hospital room for a couple of days.

I am worried about my dad.

That's why I'm making him pierogies. Pierogies are a dish from our past. They are so much a part of our past that we even have a Family Pierogie Story. Mom, if you're reading this forgive me if this isn't quite right - but this is how I remember the Family Pierogie Story.

One day when I was in kindergarten my mother decided she was going to make Pierogies for my dad. Maybe my dad was having a bad week, or maybe my mom was having a good week. This was before you could just go buy a box of Mrs. T's. Mom's stayed at home, JFK was the president and if you wanted Pierogies you had to make them yourself. It was probably a Friday because back then we didn't eat meat on Fridays and Pierogies don't have meat in them. They are also very filling so you can make a meal out of just good old pierogies. The problem was that my mom didn't know how to make pierogies - she not being Slovak. My dad remembered his mom making them, but she died when he was only 12 - so it was only a good memory, not a recipe. So my mom wants to do this nice thing for my dad but doesn't have a recipe. No problem. Back then you knew everyone's ethnic background so she called my kindergarten friend Bonnie K's mom (Arlene K.) and got the recipe. The recipe had come from Mrs. Arlene K's mom and probably from her mom before that. It was a FAMILY recipe. This was before blogs or foodnetwork.com or epicurius.com so you had to know someone to get a recipe. Or you read Good Housekeeping, but something tells me GH was not going on and on about pierogies.

Note: Pierogies - in case you do not know, are stuffed semi-circles of dough. They are NOT stuffed pasta. In the sixties we did not have pasta, we had spagetti noodles which are impossible to stuff no matter how good a cook you are. We had dough. Slovak's have dough. Got that? I did not make up this rule - I was only 5 years old at the time - it's just the way it was.

Now making Pierogies is no simple task, but my mom didn't know that because she didn't have anyone to teach her how and she never saw anyone make them. But my mom's pretty smart and she started to making them, figuring them out as she went along. Now, you have to picture this. There are alot of littles in my family. I was 5 - which makes my sister 8, my brother 6 1/2, my younger brother 3 and my younger sister either newborn or my mom 9 months pregnant. (there's another sister but she was not born yet at the time of the great Family Pierogie Story) It could not have been easy making those pierogies with all us littles running around.

So my mom is making the dough, rolling it out, cutting it into rounds, stuffing those little rounds with potatoes and cheese and some with buttery fried cabbage (cabbage is real big in Slovak pierogies).

So she's making those pierogies and she's putting them in a big yellow mixing bowl so she can boil them later for dinner. I still remember that bowl. It was one of those huge bowls that could hold mounds of stuff. I bet she had about a 100 pierogies in there. She was also probably humming a little while she was rolling and stuffing because my mom always hums a little when she is concentrating or doing something that makes her happy. I can just imagine how pleased she was with herself for making all those pierogies for my dad as a big surprise. It must have taken her all day and I just know she couldn't wait to show my dad when he got home from work.

Well, as the Family Pierogie Story goes, my dad gets home from work all hungry and my mom proudly shows him the big bowl full of pierogies. When she goes to take them out of the bowl to begin boiling them she discovers that you can't stack pierogies; what happens is they stick together to form the biggest pierogie in the world. Just one big lump of dough (not pasta) and potatoes and cheese and buttery fried cabbage.

I'm sure my mom cried that day. But she went on to learn from her mistake and she taught me how to make pierogies and lay them on wax paper lined cookie sheets until I'm ready to boil or saute or fry or freeze or whatever I'm doing to them.

A few days ago my daughter-in-law asked me if I'd teach her how to make pierogies so she can make them for my son. Hopefully she will one day teach my granddaughters. The tradition continues with a recipe that is probably over 100 years old. That makes me happy even though I'm still terribly worried about my dad.

I think I'll probably hum a little while I'm making these pierogies. Just like my mom did.


Pierogies: (old world)

4 cups flour
4 eggs - unbeaten
1 1/2 teaspoons salt
cold water

Make a well in the center of your flour. Crack eggs into the well. Add salt and some cold water (a little at a time) and knead until smooth. Keep the dough moist, not sticky. If it's too sticky add a little more flour. Roll out thin on a lightly floured board, cut in circles. Fill. Moisten edges and pinch closed. THIS IS THE IMPORTANT MORAL OF THE FAMILY PIEROGIE STORY:

Lay out on waxpaper lined cookie sheets until ready to cook (you can also freeze at this stage)

Cook in boiling water for approximatley 15 minutes (or until they float). Remove from boiling water and toss with melted butter.

My favorite filling:
Mashed Potatoes (you can make them yourself or cheat and buy store bought)
Lot's of shredded cheddar cheese - put enough cheese in the potatoes so you can TASTE the cheese.
My dad's favorite filling:
Fry shredded cabbage in butter. Salt and Pepper to taste. Let cool. Spoon on dough rounds. Fold and seal.

Here is an updated fresh take on an old world classic: (from Jamie Oliver's Cook with Jamie - he calls it Ravioli - but we KNOW it's really pierogie)

Pierogie with Pecorino, Potato and Mint:

Dough:
5 cups flour (use tipo 00 if you can get it, if not just use all purpose)
6 large eggs

Place the flour on a board or a bowl. Make a well in the center and crack the eggs into it. Beat the eggs with a fork until smooth. Using your fingers, work the flour into the egg. When everything is incorporated, knead until smooth and satiny. This will take a while, but you'll know when it's done because you'll have a big, smooth, satiny lump of dough instead of a rough and floury lump of dough.

You can also use your food processor to make the dough. Just put everything in, whiz it up until it looks like breadcrumbs, then dump it out and knead as above.

You can either roll it out at this point, or if you have one, use your pasta maker roller to roll out streams of dough.

Stuffing:
3 medium to large potatoes (about the size of your fist)
Salt and Pepper
7 tablespoons of butter plus 2 more
2 handfuls of grated pecorino cheese plus more for serving
1/4 nutmeg - grated
zest of 1 lemon
a bunch of fresh mint

Preheat oven to 400. Wash and prick your potatoes, roll in a little salt and bake until done, about 1 hour. Cool. Scoop potatoes out of their skins and put them in a bowl. Chop half your mint leaves. Add 7 T of butter, nutmeg, salt and pepper, cheese, lemon zest and mint to potatoes and mash with a potato masher.

Roll out your dough. Cut into rounds. Fill, then fold and seal. You already know to lay them out on wax paper, right?

Put on a pot of salted water. Bring to a boil and cook pierogies for 3 1/2 minutes. While the pierogies are cooking, melt the last 2 big tablespoons of butter in a saute pan. Add a little of the cooking water and simmer until you have a light sauce. Using a slotted spoon, transfer the pierogies to the saute pan. Turn to coat. Serve with extra pecorino and torn mint leaves.

And remember to hum a little while doing all this. It's part of the great Family Pierogie Story


Related Posts with Thumbnails